Let me start off by saying I am SO SORRY for not posting on here for 4 months! OMG, I can't believe it's been that long. Things have been so hectic around here that I haven't stopped to get on here and make updates. First off, in August, I had a pretty big audition and call back that took up about 3 weeks of my life. No, I didn't get the part, but it was a wonderful experience to have been a part of. Then in September I went on our yearly vacation to Big Bear with my mom, and then two weeks later I found out I was PREGNANT. Well, we were all (and still are) very excited about the new baby, and then the morning sickness struck with a vengance when I was only 5 weeks along. For about a month or so I couldn't even drag myself off the sofa, and that's with the anti nausea meds that I am on. Lets just say that this new baby is giving me a run for my money. Anywho, on the productive side of things, I've been working on a few new tutorials that I put together for Amanda over at the Quilted Fish. She's got a new paper line that she started up this year, and I made her paper crafting team. Yay! The first tutorial is already up on her blog (you can see it HERE), but I'll post it here as well in the next day or two. The next two tutorials I just completed today, so I'm really excited about those going up up within the next week. They're all easy tutorials that help get us ready for the holiday season. Amanda has this great holiday paper line with Bazzill Basics Paper called "Holiday Style," and it is too darling for words. I used this paper to create two gift boxes (one mini and one medium sized), as well as a paper gift bow that I also use in my larger gift box tutorial.
Anyway, my appologies a million times over for my absence these past few months, and I PROMISE to get you some new tutorials on here ASAP!
Tuesday, December 6, 2011
Tuesday, August 2, 2011
Frilly Fabric Flowers
Hello everyone! Today’s fabric flower tutorial is actually going to be part 1 of 2, in the making of a beautiful, shabby flower covered lamp shade tutorial. The plan is, that by next week I will have a lamp shade, and we will be applying these fabric flowers that we make today, to it.
Now... since my internet has been giving me the hardest time ever today, shutting down on me everytime I start downloading my photos, as well as half way through typing my tutorial for you all, I had to come up with another way of getting my tutorial to you all. Since my computer didn't want to cooperate with me typing straight onto my bog, I compliled it into a nice and easy PDF... did I mention that this is printable? It is! Not that this tutorial is so difficult that you'l really need to print it out, but just in case, you can!
SO... with all that out of the way, you can go ahead and find my easy Frilly Flower Tutorial HERE
Tuesday, July 26, 2011
I have plans....
Ok... so, I have had this plan for a tutorial for about a month and a half now, but am struggling to find the neccessary materials, at a price which I am willing to pay. Frustrating... I know! I feel horrible about not posting a tutorial in the longest time, but I can't find what I need to get it done. With that said, I have grown tired of waiting, so as of next week, I will post phase one of the tutorial, and then phase 2 when I can get my hands on what I need.
Enough of being cryptic... here is what I am planning... a Fabric Flower Lamp Shade.
 If you're not as excited about this as I am, then you just don't understand what it is I'm exactly talking about. Have you ever seen those uuber cute silk rose covered lamp shades? You know, the ones that cost upwards of $50+, or more (if you get the one from Pottery Barn, as pictured to the right). Well... I came up with an idea (All on my own, mind you!) for something along the same lines, but that costs next to nothing; and, if you are a quilter, sewer, lover of fabrics, etc. then you probably have everything but the lampshade already. (See above mentioned "missing materials"!) Now, while my lampshade isn't as cute as Pottery Barns, and doesn't have perfect little roses, it does give a nice illusion to being flower covered, and it adds a nice shabby chic touch to a room, since the ends are rough, and all the petals are gathered and frilled.
 There are ways to acheive a very similar DIY looking lampshade, but it requires purchasing silk roses, cutting the stems off, and gluing them all over (as seen in the picture to the left, the tutorial for which can be found HERE), but this will add at least an additional $15 - $25 (depending on the size of the lampshade and roses used) to the total price, and that is just too much for me to spend on a DIY craft. Already I'm being super picky, because I insist on finding a lampshade for $10 or less, and am having some difficulty with that. By the way, not to get too far off topic, but has anyone ever noticed how damn expensive lamp shades are?? It's ridiculous. $30- $50 for a plain lamp shade? I found one at Target for around $12, and I'll probably end up getting it, but I'd really like to find one for $6. When your husband doesn't freely fund your crafting, you try to pinch and save where you can!
Enough of being cryptic... here is what I am planning... a Fabric Flower Lamp Shade.
 If you're not as excited about this as I am, then you just don't understand what it is I'm exactly talking about. Have you ever seen those uuber cute silk rose covered lamp shades? You know, the ones that cost upwards of $50+, or more (if you get the one from Pottery Barn, as pictured to the right). Well... I came up with an idea (All on my own, mind you!) for something along the same lines, but that costs next to nothing; and, if you are a quilter, sewer, lover of fabrics, etc. then you probably have everything but the lampshade already. (See above mentioned "missing materials"!) Now, while my lampshade isn't as cute as Pottery Barns, and doesn't have perfect little roses, it does give a nice illusion to being flower covered, and it adds a nice shabby chic touch to a room, since the ends are rough, and all the petals are gathered and frilled.
  There are ways to acheive a very similar DIY looking lampshade, but it requires purchasing silk roses, cutting the stems off, and gluing them all over (as seen in the picture to the left, the tutorial for which can be found HERE), but this will add at least an additional $15 - $25 (depending on the size of the lampshade and roses used) to the total price, and that is just too much for me to spend on a DIY craft. Already I'm being super picky, because I insist on finding a lampshade for $10 or less, and am having some difficulty with that. By the way, not to get too far off topic, but has anyone ever noticed how damn expensive lamp shades are?? It's ridiculous. $30- $50 for a plain lamp shade? I found one at Target for around $12, and I'll probably end up getting it, but I'd really like to find one for $6. When your husband doesn't freely fund your crafting, you try to pinch and save where you can!
Anyway, since I am still looking for the perfect lampshade, I've decided to post a tutorial for my Frilly Fabric Flowers here next Tuesday, and then hopefully by the following Tuesday I'll have found a lampshade - or convinced my husband to cough up the $ for the one I already found - and then I'll complete my tutorial, by showing how to attach the flowers to the shade, and finish the project off (We all know how to use a glue gun right?). I'd ideally like to pair the lampshade with this darling pink "crystal" lamp base found HERE at ToysRUs, but am trying to find away around spending $30 for it... cheap, who me? ;) This finished product will then move to it's permanent residence a top my daughters dresser in her newly designed ballerina room, and hopefully give it just the right finishing touch.
Ok then, now that you know my plan, I look forward to "seeing" you back here next week, when I'll be diving into the oh so easy tutorial of frilly flower making. In the meantime, resist the urge to throw away your scraps of fabrics, and cut yourself a 2" circle template (makes this process go SO much faster if you have a template to cut around).
See you then!
Saturday, July 2, 2011
Unbelievable Macaroni Salad!
So, I've gotten a little behind on my posts lately, but hopefully this recipe will make it all up to you, and all will be forgiven as soon as you take your first bite! I'm not including a full photo tutorial with this recipe, since I won't be making it until the 4th, but I wanted to post the recipe now, so that everyone out there will get the opportunity to try the greatest Mac Salad you've ever had, and be the hero at this Monday's BBQ.
This recipe comes from my father, so it's a really big deal that I'm leaking this one out, since I guard his recipes with my life. If I haven't ever mentioned it on here before, my dad is the best cook I have ever known - actually I should probably call him a chef since he's owned and operated a few restaurants in his time. My love of cooking, and everything that I have learned, has come from my dad. It still blows my mind how damn good he is! He'll show up to visit for the weekend, and manages to whip out the most flavorful gourmet food you've ever seen, and he does it effortlessly to boot. If it were me making the meals that he makes, not only would they not taste as good as his, but it would look like a tornado had ripped right through the middle of my kitchen. Not my dad, though.... he's the best I've ever seen, and I'll stand by that to the grave.
So... here goes! You're in for a treat!
"Never Go Back to That Deli Stuff"
Mac Salad
Ingredients
1 lb, small Elbow Macaroni
5-6, stalks Celery
1, large Brown Onion
1, small jar sweet pickles (or gherkins)
8oz, Longhorn Cheddar Cheese
1 C, Mayo
Salt and Pepper, to taste
Directions
1) Cook macaroni according to package directions. Allow to cool completely.
**Tip** Add a drizzle of evoo to the water to keep the macaroni from sticking.
2) Finely dice celery, onion, pickles, and cheese.
3) Add veggies and cheese to cooled macaroni. Add mayo, and stir to combine.
4) Add salt and pepper to taste.
**I've found it's best to add less S&P, and allow others to add more if they desire.
So there it is! It's really simple, but Oh Man does it blow the competition out of the water! Trust me on this. Make a batch this 4th of July, spread the love around to your friends, and see how everyone just praises you for your amazing Mac Salad. The best part... ya, there's a best part! This salad actually gets better as left overs. How many recipes can do that?!
I'll post the full tutorial this coming Friday, pictures and all, so that you all can see exactly how I dice up my veggies and cheese... according to my dad's instructions!
Please let me know how things turn out for you if you do end up trying this recipe. I'd love to hear your feedback!
Cook, Eat, and Enjoy!
Saturday, June 11, 2011
Foodie.... Saturday??
So I completely forgot about Foodie Friday yesterday, so I'm going to go ahead and make up for that today. My family was in town this week, and were leaving yesterday, so my entire day was geared towards meeting up with them before they flew out, and as a result, Foodie Friday didn't happen. My sincerest apologies!
Anyway, this week I had planned on linking to other bakers sites for my Foodie Friday tutorial. I'm not sure if any of you remember, but I have a few favorite food blogs that I like to frequent - The Pioneer Woman has already been posted about all over this blog - and in the past couple of weeks I have been on a cookie frenzy, testing out cookies from two of these sites. What I have discovered is some truly divine (and guilty) pleasures! I would blog about them myself, but these women do such a wonderful job at it, and since these are their recipes, I'll just link you to them!
First off, back on the week that I made my A-Mazing Chocolate Chip cookies, I also made Oatmeal Raisin Cookies for my husband, since they are his favorite. I'm a bit picky when it comes to oatmeal raisin cookies, and I found a wonderful recipe on the Smitten Kitchen blog. If you'd like to test out this recipe for yourself, you can find it HERE! From my personal experience, I had better result with the cookies when I didn't chill them first, but you can try both ways if you'd like.
My second recipe is for the best Sugar Cookies my husband and I have ever eaten... I mean, seriously, these things are dangerously good! The recipe comes from none other than the extremely talented I Am Baker, and she uses a secret ingredient to her sugar cookies that just puts them over the edge... almond extract. I can't even begin to explain to you what this does to the taste of these cookies, you're just going to have to trust me, and try this recipe out.... right now! My only comment on this recipe is for you to be sure to not over cook these cookies. Trust in her cook time, and they will be wonderful. They may look under done, but when they cool, they are perfectly chewy... so trust in what she says! You can find her sugar cookie recipe HERE!
So there you have it... two more AMAZING cookie recipes, that have found a permanent residence in my recipe box, and I am sure will find their place in yours as well. If you happen to make these for yourself, I would love to hear about how you found them to be for you and your family.
Until then....
Happy Baking! Happy Eating!
Tuesday, June 7, 2011
Get Covered!
Todays Tutorial Tuesday, is going to be one of those where I just link you oiver to someone else's cool idea. I know... it's kinda lame, but hey, this tutorial changed my life this week. You see, everything I have in my sewing room, I basically "inherited" from my mother-in-law... including my ironing board... which has never had a cover. So for the past 2 years I've been ironing on a board without a cover, and for every day of those last two years, I've been telling myself that I have to get a dang cover for it. Finally, after all this time, I sat down a couple of days ago and began to google (my favorite thing to do!), and I found a pretty easy ironing board cover tutorial, that ANYONE can whip up in less than an hour. How awesome is that? See how this could change a girls life? No? Ok... well maybe I just get overly excited about things, but after 2 years of not being covered, all that is about to change. Additionally, I just moved and re-decorated my entire craftroom, so I'm going to make an ironing board cover to match... that can make a girl excited in and of itself!
Ok... enough talking, lets get down to sewing! If you would like to check out this quick and easy ironing board tutorial, click HERE.
Ok... enough talking, lets get down to sewing! If you would like to check out this quick and easy ironing board tutorial, click HERE.
Happy Sewing!
Friday, June 3, 2011
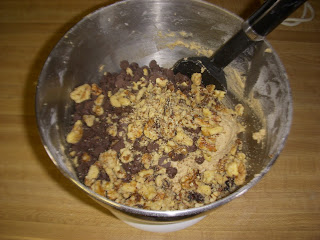
A-Mazing Chocolate Chip Cookies!
I LOVE chocolate chip cookies, but I've always been on the hunt for the perect one... and I think I finally found it. Here's my feeling on the whole thing, brown sugar makes the cookie. So for about an entire week I sat on the computer reviewing recipe, after recipe, after recipe... and I think I've found it! I've made these cookies a few times now, and every time I do my husband just sings their praises. I can't remember exactly where I found the recipe (I reviewed WAY too many), but I think it was from someone on Allrecipes.com. I love that site! Anyway, back to the whole point of this post... Let me share the recipe with you!
 ** Apparently my head was not in this when I was taking the photo, because the eggs are missing, and I am showing 1 C sugar instead of a 1/2 C. Don't be like me... follow the ingredient list above!


A-Mazing Chocolate Chip Cookies!
Makes 40 - 45 cookies
Ingredients
1 C (2 stks), Butter - softened
1/2 C, Sugar
1 1/2 C, Brown Sugar
2 Eggs
2 tsp, Vanilla
2 3/4 C, Flour
3/4 tsp, Sea Salt (not table salt!)
1 tsp, Baking Soda
1 1/2 tsp, Baking Powder
2 1/4 C, Chocolate Chips
1 C, Walnuts - chopped

Directions
Preheat oven to 350
Cream butter and sugars on Med-High for 3 minutes, until light and fluffy.

Add eggs and vanilla, and beat an additional 2 minutes.

In seperate bowl, sift together flour, salt, baking soda, and baking powder. Add dry indredients to wet ingredients, 1 cup at a time, scraping the sides after each addition.

Gently mix in chocolate chips and walnuts.


With a cookie scoop, or a Tablespoon, drop cookie dough onto a greased cookie sheet.


Cook 12 - 14 minutes
Let rest 2 minutes, then remove from pan and cool an additional 3 minutes.

Eat and Enjoy!
Tuesday, May 31, 2011
Crochet Flower Button Hole Cover Tutorial!!!
Welcome to my first Tutorial Tuesday!! Today I have a tutorial planned that goes perfectly with my "Oh So Sweet" Patchwork Dress tutorial, which you can find at Riley Blakes Cutting Corners HERE. Today's tutorial is a super easy Crochet Button Hole Cover, which just so happens to be in the shape of a flower. I designed this to compliment Riley Blake's Sweet Divinity fabric, which I used in creating my patchwork dress.
SO... Here goes!
Crochet Flower Button Hole Cover (Beginner +)
This crochet button hole cover is a cute way to jazz up any button hole, and create a darling flower for your button to nestle into. The pattern is relatively simple, working with the half-double crochet stitch, as well as simple chain and slip stitches. As long as you are able to work slowly, being able to grab the tiny threads, you will do fine and have beautiful crochet flowers in no time!
Materials:
• 3mm (D) crochet hook
• Appropriate weight natural fiber thread
Basic Key Terms:
Instructions:
Rnd 1: Ch. 10. Sl st into 1st ch. forming a circle.


Finishing:


SO... Here goes!
Crochet Flower Button Hole Cover (Beginner +)
This crochet button hole cover is a cute way to jazz up any button hole, and create a darling flower for your button to nestle into. The pattern is relatively simple, working with the half-double crochet stitch, as well as simple chain and slip stitches. As long as you are able to work slowly, being able to grab the tiny threads, you will do fine and have beautiful crochet flowers in no time!
Materials:
• 3mm (D) crochet hook
• Appropriate weight natural fiber thread
- (I used a doily weight bamboo crochet thread, which called for a 1.5mm crochet hook, and doubled it up for extra thickness. ) As long as you use a 3mm crochet hook, any thread that can work on that hook is fine!
Basic Key Terms:
- Ch. = Chain
- St. = Stitch
- Sl st. = Slip Stitch (although I think I write this one out)
- Hdc = Half-Double Crochet
Instructions:
Rnd 1: Ch. 10. Sl st into 1st ch. forming a circle.

Rnd 2: Ch. 4. *Hdc into circle, ch. 2* Repeat from * 7 more times. (You should have a total of 8 hdc’s worked into the circle.) After completing your last ch.2, slip stitch into the top of the first hdc.

Rnd 3: Work *5 hdc’s into the 1st ch. 2 space. Ch. 1. * Repeat from * 7 more times, working 5 hdc’s in each ch. 2 space around. After working your last 5 hdc’s into the last ch. 2 space, slip st. into the same space.


Rnd 4: Ch. 1. *Work 6 hdc’s into the 3rd st. from hook (this will be the center st. of the lower “scallop” [5 hdc’s]). Slip stitch into the ch. 1 space.* Repeat from *, working all the way around the circle.


Rnd 5: After your final slip st. bind off and weave in ends.
Finishing:
- Sew button cover around the opening of the button hole opening, right where the button will push through and sit.
- Push the button through the button hole, and marvel at the adorable creation you have made.


Ta Da!!! You now have a darling flower button hole cover. Easy as pie!

Friday, May 27, 2011
Changes...
For those of you who stumble upon my blog on a semi-regular basis, you may be wondering why I keep posting about food. I admit that the first few posts were completely random, and based solely on what I happened to be excited about making that day, but today's food post was very deliberate, and is the start of new things to come for my blog. I have decided to create a "schedule" for my blog, so that you - my readers - may know what to expect from me, and when. So, with that said, Fridays will now be "Foodie Friday," and Tuesdays will be "Tutorial Tuesday." Foodie Fridays will highlight a recipe that I love, or stumbled upon and just couldn't resist; and Tutorial Tuesdays will highlight a tutorial - of some craft - either from my own head, or linking a tutorial that I found on the web. I know this is a BIG goal to have, taking on two days worth of ideas and blogging about them, but that's what I'm aiming for. I may fail miserably, and only have tutorials and recipes every other week, but I promise to try my best to get them on here weekly. So far I've got today's Foodie Friday done, and have something planned for this up coming Tutorial Tuesday, and hopefully they keep on coming. I'm keeping my fingers crossed! ;)
Till then... have a wonderful Memorial Day weekend!!
~ Alicia
Till then... have a wonderful Memorial Day weekend!!
~ Alicia
The Perfect Spaghetti!!
Ok, so I know "The Perfect Spaghetti" is a rather big statement to make, and I realize that everyone's tastes might not run along with mine, but this IS the perfect spaghetti for my family. After years of searching for the right spaghetti recipe to suit my family's desires, I finally came up with my own, after picking and choosing what I liked from others out there on the web. Here's the dilemma I faced... I am a veggie girl, my husband is a plain meat sauce kind of guy, and we both prefer a thicker, more savory (none of the sugar stuff in this recipe) kind of spaghetti. What I came up with was a simple, tasty spaghetti, that even my 3 year old asks for all the time!
So, here it is...
What You Need:
1 pkg (1lb.) Italian Sausage (or 1 lb. from the butchers counter)
1 28 oz. can Crushed Tomatoes
1 28 oz. can Diced Tomatoes
1 Large Onion, finely diced
2 Green Bell Peppers, finely diced
1 pkg Mushrooms, finely diced
1 1/2 Tbsp Garlic, chopped (more if you desire)
1 1/2 Tbsp Oregano (more if you desire)
Salt and Pepper, to taste

Instructions:
1) Heat a large skillet over medium high heat, and drizzle around with evoo.
2) Remove sausage from casing (if you didn't purchase from the butcher), and throw it in the skillet. Break up the sausage with the back of a fork, so that it begins to resemble ground beef. Continue to break up the sausage as it browns.


3) Once the sausage is browned, put it into your slow cooker (if you don't have one, use a big pot)

4) Add your cans of tomatoes, veggies, garlic and oregano, and mix thoroughly.


5) Cover your slow cooker, and turn it to high.

6) Cook for 3 hrs, stirring occasionally.
7) Add salt and pepper to taste, stir to combine. Recover, turn heat to low, and cook an additional 2-3 hrs, or until ready to eat.
8) When ready to serve, brown up another package of Italian sausage to go on top, or make some Italian meatballs (I'll have to post my recipe for that later!). Cook spaghetti or fettuchini noodles, according to package directions. Put your drained noodles in a bowl, and spoon a healthy portion of spaghetti sauce over top, finishing off with your Italian sausage or meatballs. Round out your meal with "The Bread," recipe by, none other than, The Pioneer Woman. Pour yourself a nice glass of wine (I prefer Riesling), and ENJOY!
Sunday, May 15, 2011
Mmm...Mmm...Good!
So I'm posting about food again... Sorry! ;) BUT I just made the most amazing breakfast EVER this morning, and I just had to share. In my last post I made mention about a couple of my favorite food blogs, and like my last post, I am again singing the praises of the Pioneer Woman.
Last week I found a recipe for Lemon Blueberry Pancakes, and thought, "Oh my, those look good!" My husband is a BIG breakfast person, and I am not, so rarely does he get a good home cooked breakfast from me, however, when I saw these pancakes I knew I had to test them out, and treat my husband to a good morning meal. Now I'm not going to go on and on about how I prepared breakfast this morning, but I will say that these pancakes are AMAZING. So... with that said, I highly suggest that you treat yourself, your significant other, or anyone else you happen to know, and try these pancakes for yourself the next time you make breakfast. You can find the recipe at the Pioneer Woman website by clicking HERE.
Last week I found a recipe for Lemon Blueberry Pancakes, and thought, "Oh my, those look good!" My husband is a BIG breakfast person, and I am not, so rarely does he get a good home cooked breakfast from me, however, when I saw these pancakes I knew I had to test them out, and treat my husband to a good morning meal. Now I'm not going to go on and on about how I prepared breakfast this morning, but I will say that these pancakes are AMAZING. So... with that said, I highly suggest that you treat yourself, your significant other, or anyone else you happen to know, and try these pancakes for yourself the next time you make breakfast. You can find the recipe at the Pioneer Woman website by clicking HERE.
Happy Eating!
Wednesday, May 11, 2011
FOOD!!
I'm kind of a foodie. Actually, I am a really big foodie. I love food. I love to bake it. I love to cook it. And guiltily, I love to eat it! So, ever since I have retired from school to be a stay at home mom, I cook... and bake... and eat... ALOT. All the while desperately trying to keep a hold of my little figure. I want to cook, and bake, but then I have to eat it. It's kind of an addiction - the cooking - I'm just trying to figure out how to manage the eating part. :(
So, to get to the point of this whole thing, yesterday while browsing her many tasty recipes, I came upon her recipe for home made flour tortillas. Now I have always wanted to make my own tortillas, but have always been a bit scared. BUT, Ree said that there was no worries, so I said what the heck, and went to work today making 4 dozen flour tortillas. Like Ree mentions in her recipe, there is a learning curve to cooking the tortillas, but after throwing out the first few for being as stiff as a board, I was making A-mazing tortillas like a pro.

(By the way, they're not supposed to be perfectly round... not that I could have gotten them that way even if they were! ;)
Then to make it even better - and because I have a really bad sweet tooth right now - I took my last two tortilla dough balls, rolled them around in sugar before rolling them out on my cutting board, and then sprinkled then with cinnamon and little more sugar. When cooking, the sugar begins to caramelize on the outside, and because I rolled the dough around in sugar before rolling it out, the tortilla was completely laced with sweet sugar on the inside as well. It was just the right amount of sweetness to satisfy my mid-afternoon craving, not too sweet, but just enough... especially that caramelized bit!

So what I say to you now is go check out her blog... it will change your life! And if you want to make your own flour tortillas, you can find the recipe on her site HERE.
Happy Baking. Happy Cooking. Happy Eating.
(Hopefully guilt free!)
Friday, May 6, 2011
The NEW project
Of those of you who know me personally, you know how big of a Braves fan my husband is, so for fathers day/ my husbands birthday this year, I've decided to create a quilt just for him. Let me start off my saying that this quilt is a BIG pain in the butt, like many of my quilts are, but I have high hopes for it's outcome! Unfortunately, my sewing machine likes to give me a ridiculously hard time when it comes to the zig-zag stitch required for applique, but I am trying my best to make due with the machine I have (without ripping my hair out, or throwing my machine across the room in frustration), and thanking God - upon encountering each hiccup in stitching - that my husband is a simple man. Amen for that! Showing my quilting mother-in-law my work is another matter entirely, but my husband... well, he's happy with anything. God bless the simple man!
Anyway, my entire idea was based quite simple around the Braves logo, which I would like to make the main focus of the blanket.
Doing so, I had to blow up and puzzle piece together the logo to be approximately 20"x40", to be the center focal point of a 60"x80" blanket. For relative ease (HA!), I decided to split the logo into 2 parts, the name and the tomahawk. After blowing up the images (a 2 day process) I then traced the logo(s) onto wax paper in 3 parts, the white, the blue, and the red, which is now being appliqued one right on top of the other, using my machines dodgy (yes I just said dodgy! ;) ) zig zag stitch. God help keep me sane! Currently I am working on attaching the red braves logo to the the blue outline, and will post pictures as soon as that phase is finished. While the stitching is far from perfect, and I am not fussing to do any extraordinary applique technique, the effect is still very nice, and eye catching.
Ok, so you may be wondering what is going to make up the remaining 40"x40" of background to fill my 60"x80" blanket, after the main logo is complete. Well.... I pondered this one for a while myself. I knew I wanted to do some kind of border, with the possibility of utilizing square tiles with something significant and relevant, but what? Initially I thought, "wouldn't it be cool if I could get signatures from the players on fabric squares?," but then quickly dismissed that idea, knowing that since I am not a 10 year old boy, the chances of me getting my fabric signed by major league baseball players would be slim to none. So I began thinking of a new idea, equally as amazing. And you know what?? I think I found it!


For those of you who do not know, these are alternative, and in a couple cases, outdated, logos of the Atlanta Braves. My idea is to create a border around my blanket that is comprised of 10"x10" squares, with the center being an alternative logo for the team, and finished off with a 1" mitered border in red. I think it would look pretty neat myself. I am assuming for now that this would be done by applique as well, with the exception of the Indian brave, which would probably be easiest just to print onto fabric paper... not as neat, but would come out looking a heck of a lot better than me trying to applique him to a piece of plain fabric.
In using 10"x10" squares, I would need 24 squares total. For the corners, I also plan on appliqueing hand laced baseballs into those squares, which I think would add a nice touch to the blanket. That would then leave me needing 20 squares of logo applique, which if I just use the five shown above, would repeat 4 times around the border. Additionally, with the border being 10"x10", that takes 20"x20" off the entire blanket, which would then leave a 40"x60" center, the background of which will be blue, with the logo shown at the top of this post being 20"x40"... if my math is correct, that would leave 20"x20" of blanket space. I think that sounds fairly proportional.... I think! ;) lol.
Anywho, that's the plan; I'll keep you updated on the progress of the blanket, and upload some photos as soon as phase one of the logo applique is done.... that is, of course, if you all promise not to make fun or criticize my "dodgy" stitching! :)
Tuesday, April 26, 2011
"Oh So Sweet"

Let me know if you make a dress of your own, I'd love to see what you come up with!
~ Alicia
Wednesday, April 13, 2011
Pockets, Pinwheels, and Pillow Cases!
Remember how I mentioned that there are some pretty neat tutorials at The Quilted Fish blog, put together by her amazing design team? Well, this past week I decided to dive right on into making one, and here it is!


 This pillow is SO neat! I love how detailed it is, as well as how fun it is to have a pocket on the front. As I mentioned last month, I'm really into french shabby chic, romantic, decor right now, and am in the process of redecorating my daughters room to be a romantic ballerina room, all done in soft pinks, creams, and florals. I'm currently in the process of making a "big girl size" rag quilt for her, and her new room, and when I saw this pillow tutorial I just knew that I had to make it in the same fabric to complement the collection. Don't you just love the color scheme?! As soon as my daughter saw it, she went in her room, grabbed her stuffed cat, and stuck it in the front pocket. This is now how she tucks her stuffed animals in to sleep at night!
If you're interested in making this for yourself, check out the "Pocket Full of Pinwheels, Too!" tutorial, which can be found HERE, at The Quilted Fish blog. This tutorial was created by Karrie Lyne of Freckled Whimsy, who is also a part of the Quilted Fish Design Team.
If you do make this pillowcase, I'd love to hear about it!
~ Alicia
Riley Blake Tutorial to Launch APRIL 26TH!!!!
So, after a very long time of planning and promising, my tutorial for Riley Blake is final scheduled to go up on April 26th! If you remember, this all began back in January when my first package of goodies came from Amanda Herring of the Quilted Fish. Now that I know exactly when my tutorial will be launched, and who will be hosting it, I can now reveal to you what my BIG tutorial project is! Ready???

I present to you.... the "Oh So Sweet" Patchwork Dress!

If you'd like to learn how to make this dress, please check out my tutorial at Riley Blakes "Cuttin Corners" on April 26th! I will be adding a button link to the side of my blog, the week before it launches, that will link you directly to my tutorial.
In the mean time, if you like to check out other great tutorials, head over to the Quilted Fish blog, and see all the amazing projects her design team has put together for everyone!
Till next time,
Alicia
Thursday, March 24, 2011
New Toys!!!!!
So, about a month ago Joanns had their Cricut Cake Mini on sale again for $99, and of course when I went in to buy it, there was none in stock! Now keep in mind, this has been the case since Thanksgiving , so I was getting a little antsy, to say the least. This time was different, however. This time I went down there and said, "I would like to special order the Cricut Cake Mini," and I had it in my hands within 2 weeks. YAY!!! So... I am excited! Months and months of waiting, and it's finally mine. Anywho, I brought it home, opened the box, and not too much to my surprise, the Cricut Cake Mini is almost exactly the same machine as the Cricut Personal Cutter. What IS awesome about it, however, is that it makes cakes, cookies, cupcakes, etc. fabulous by cutting baking materials.

The first day I brought it home I wanted to use it SO badly, but since I was scheduled to be at rehersal in 3 hours, there was no way that was going to happen. As a result, my beautiful machine has been sitting in its box, in the kitchen cupboards for aproximately 2-3 weeks. Well, yesterday that all changed! Being a full-time, stay-at-home mom now, I have the time and freedom to explore my creativity, and to top it all off, it counts as mother-daughter bonding, and expressive play/ art creation! For those of you who didn't study early childhood education in college, this basically means that my daughter is having fun, while learning and growing.... It's a win-win!
Back in January, I wanted to make a really awesome 2 tiered Mini Mouse cake for my daughters 3rd birthday, made with fondant and gumpaste, with polka dots and minie mouse heads all over. Unfortunately, I didn't have my Cricut Cake by then, but now I do - SO, while the birthday is gone and done, I wanted to play around with my new toy, and see what it could do. One of my ideas, along with the 2 tier cake, was to make cupcakes (which my wonderful sister-in-law made) AND to add a 1" homemade chocolate wafer cookie, cut into the shape of Minnie Mouse. Yesterday I pulled out the recipe for the cookies and got to work, to see how darling my idea would have been. By the way... the chocolate wafer cookie recipe is SO good, and SO easy, so feel free to check it out at the Smitten Kitchens blog http://smittenkitchen.com/2009/03/homemade-chocolate-wafers-icebox-cupcakes/. When making my Minnie Mouse cookies, I followed the recipe to the part of kneading the dough, and then proceeded to follow the instructions for rolling it out onto my Cricut Cake cutting mat. One thing I learned from this experience, is that purchasing the Cricut Cake Tool Kit is probably a good idea, and smart investment. I'm going to have to use my machine again with fondant rather than cookie dough, to see if my tools are any better, but I think that the Cricut Tool Kit would probably be best, and is a fair price for what they provide. My spatula was fine (Cricut's is smaller, which could be nice), but I don't suggest using a full-sized rolling pin... definately invest in a fondant roller!
After rolling out my cookie dough onto my cutting mat (it was uneven, but whatever!) I popped in my "Mickey and Friends" cartridge, and began to cut my Minnie Mouse cookies. This machine is SOOO awesome! Without a hitch the machine began to cut my cookie dough into perfect Minnie Mouse heads.... I was SO excited! Now began the task of removing the Minnie shaped cookies from the cutting mat, which was a long process. When working with cookie dough, you constantly have to put it into the freezer to harden a bit at each stage, which makes this whole process a bit time consuming. If you have a cute cookie cutter, I reccommend using that instead, but if you REALLY want a Cricut image then allow alot of time for making cookies... alot as in, all day! Because the cookie dough softens so quickly at room temp, I suggest putting in the freezer for 10 minutes or so 1) as soon as you finish mixing the dough, 2) after you roll the dough onto the cutting mat, and 3) after the dough is cut by the Cricut machine (this might have to be done multiple times, since the dough may thaw too much while you are in the process of removing the cookies). The dough has to be rolled out to 1/4" thickness on the cutting mat, which my full sized roller didn't do very well. As a result, some of my cookies were a bit thin, but still held their shape and looked super cute! I cooked them for aprox. 7-10 min. and let them cool, and had darling Minnie Mouse wafer cookies! While the wafer cookies aren't super mouth watering on their own (their good, but thin, so the taste doesn't resonate to their fullest potential), they would have been the perfect topper for my daughters birthday cupcakes! Now I know for next time.
 My next project is to have my sister-in-law over to make "mini" cakes with, and play around with all of our fondant possibilities. I purchased three 4 1/4" mini cakes pans at Joanns, yesterday, and plan to purchase a couple 6" pans as well. Then I need to find a good fondant and gumpaste recipe, and get started on making these cakes. Last June? July? (When did you get married, Paige?? lol), I made a 3 tiered cake for my sister-in-laws wedding (Seen in photo to the right), and while it was very beautiful, there are many things that I learned through trial and error. First off, each tier is made using TWO 2" layers of cake, yielding a 4" tier. Good to know! Second, while it is possible to decorate a cake by hand cutting fondant for decorating the cake, it would be best to use the Cricut Cake, and get a way more intricate cake design, with A LOT less work! That's why we are going to have our "mini cake baking day", because I would really like to perfect my cake making, and maybe start a mini business on the side.
 I'll be sure to take lots of photos of our baking day(s), and blog about our adventures and let you know how it went!
Till then, have fun, and stay creative!
~Alicia
Subscribe to:
Posts (Atom)