Congratulations to Heather Carroll, the winner of the Woolzies Dryer Ball giveaway. Her blog comment stated that she would like to avoid those pesky drier sheets. I hope that she finds that these will eliminate that need!
Much thanks, again, to Woolzies for making this giveaway possible.
Thank you to everyone who participated!
Friday, January 18, 2013


Wednesday, January 9, 2013
Woolzies Drier Balls Giveaway
I recently stumbled upon the opportunity to test products for a company (something I have been wanting to do for a LONG time), and as it turned out, this company just so happened to be Woolzies, the 100% natural, handmade, New Zealand wool drier ball company. I have been wanting to get my hand on some of these ever since I started cloth diapering, as I heard that they helped reduce drying time, as well as... and this was the most important factor for me... help to naturally soften your clothes. You see, when you cloth diaper, you are not allowed to use any softeners in your wash routine, as this leads to build up in the fabric and will eventually leads to repelling, which then equates to leaks. Not good. So, you have to look for other tricks to help keep your diapers soft, without that magic bottle of Downey. Softening my diapers didn't really become a concern for me until I started using prefolds and fitteds, and since they are made from natural fabrics, they are more prone to becoming stiff and less squishy. So, I started researching my options. I tried vinegar in my rinse cycle, but that didn't really do much. Then I read about dryer balls, specifically the wool variety, and I became very interested in trying them out. They claim to cut down on dry time, by separating the clothing in the dryer and properly allowing the air to circulate, as well as naturally softening your clothes by, essentially beating them in the dryer. So, when I came upon this opportunity, I HAD to jump at the chance to test these things out!

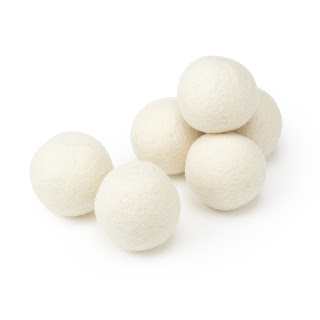
My package of dryer balls arrived in the mail last week, and I immediately set to work using them. They come in a package of 6, and are approximately 10.5" around, made of felted New Zealand Wool. I used them both in drying my clothing as well as my cloth diapers, 3 times each, and while I didn't notice a notable decrease in dry time, I did notice that my laundry came out softer, which is what I was after in the first place. For me, personally, the softness factor with my clothing isn't as important as it is with my diapers, since I can just use fabric softener to get the same effect, but for my diapers, this was a big plus. Some how, these dryer balls actually managed to make my prefolds (the worst culprits of stiffness) softer than they were previously. It's not just a little bit softer, either, but a notable difference. Do they feel like they did when they were brand new? No. But I think that's largely to due to my hard water, which they've been washed in for so long, but they did feel a lot softer than they usually do coming out of the dryer, than when I dry them without the dryer balls. I'm interested in seeing what effect these have on my new diapers, which I just prepped this week, and have only been dried using these dryer balls. They're super soft, of course, but I'm really curious to see if these dryer balls help to extend that new fluffy feeling for much longer in these new diapers.
Anyway, my conclusion to all this, is that if you cloth diaper, especially with natural fibers, I would definitely recommend these dryer balls to help keep your diapers soft. They didn't really cut down on dry time for me, but they did manage to make my diapers notably softer, which is what I wanted them for in the first place. On top of that, the package says that they are good for up to 1000 dry cycles, so, if you plan to use them just for your diapers, like I do, that means that they will last about 5 1/2 years if you wash every other day, or almost 9 years if you wash every 3 days! Taking into account that the average child potty trains at 3 years, these dryer balls should get you through at least 2-3 children in cloth diapers (if this is all you use your dryer balls for). So, are they worth it? Ya, I think so.
So.... would you like to win a free set for yourself? Just fill out the raffle copter form below, and you will be entered for a chance to win a free 6 pack from Woolzies! The giveaway will be open until 12am EST on Friday January 18th.
To buy a pack for yourself, go to any of these reatailers:
Amazon, Drugstore.com, Woolzies, Clothdiaper.com
a Rafflecopter giveaway

My package of dryer balls arrived in the mail last week, and I immediately set to work using them. They come in a package of 6, and are approximately 10.5" around, made of felted New Zealand Wool. I used them both in drying my clothing as well as my cloth diapers, 3 times each, and while I didn't notice a notable decrease in dry time, I did notice that my laundry came out softer, which is what I was after in the first place. For me, personally, the softness factor with my clothing isn't as important as it is with my diapers, since I can just use fabric softener to get the same effect, but for my diapers, this was a big plus. Some how, these dryer balls actually managed to make my prefolds (the worst culprits of stiffness) softer than they were previously. It's not just a little bit softer, either, but a notable difference. Do they feel like they did when they were brand new? No. But I think that's largely to due to my hard water, which they've been washed in for so long, but they did feel a lot softer than they usually do coming out of the dryer, than when I dry them without the dryer balls. I'm interested in seeing what effect these have on my new diapers, which I just prepped this week, and have only been dried using these dryer balls. They're super soft, of course, but I'm really curious to see if these dryer balls help to extend that new fluffy feeling for much longer in these new diapers.
Anyway, my conclusion to all this, is that if you cloth diaper, especially with natural fibers, I would definitely recommend these dryer balls to help keep your diapers soft. They didn't really cut down on dry time for me, but they did manage to make my diapers notably softer, which is what I wanted them for in the first place. On top of that, the package says that they are good for up to 1000 dry cycles, so, if you plan to use them just for your diapers, like I do, that means that they will last about 5 1/2 years if you wash every other day, or almost 9 years if you wash every 3 days! Taking into account that the average child potty trains at 3 years, these dryer balls should get you through at least 2-3 children in cloth diapers (if this is all you use your dryer balls for). So, are they worth it? Ya, I think so.
So.... would you like to win a free set for yourself? Just fill out the raffle copter form below, and you will be entered for a chance to win a free 6 pack from Woolzies! The giveaway will be open until 12am EST on Friday January 18th.
To buy a pack for yourself, go to any of these reatailers:
Amazon, Drugstore.com, Woolzies, Clothdiaper.com

a Rafflecopter giveaway
Saturday, January 5, 2013
NEW project Update... Completed Atlanta Braves Blanket!
So, it took me a year to update, but here it is... better late than never I suppose.
Last year I began working on an Atlanta Braves blanket for my husband, which I planned to incorporate their various logos into one big quilt for our outings to games... or just watching them on the sofa at home. It took a LONG time, and I completely improvised as I went, but here it is, the completed project.

The center logo was traced, and cut out in layers, and then sewn together layer by layer to create one big applique. It was a compete pain in the butt, but ended up paying off and being worth it in the end. Doesn't it look amazing?!


Along the short edges I have the old logos, starting back in 1900 with the Boston Beaneaters, all the way up to 1966 when they became the Atlanta Braves.

The long edges then repeat the newer logos (I didn't get the newest double crossed tamawk logo, as this just came out after I had finished printing everything. :( ).
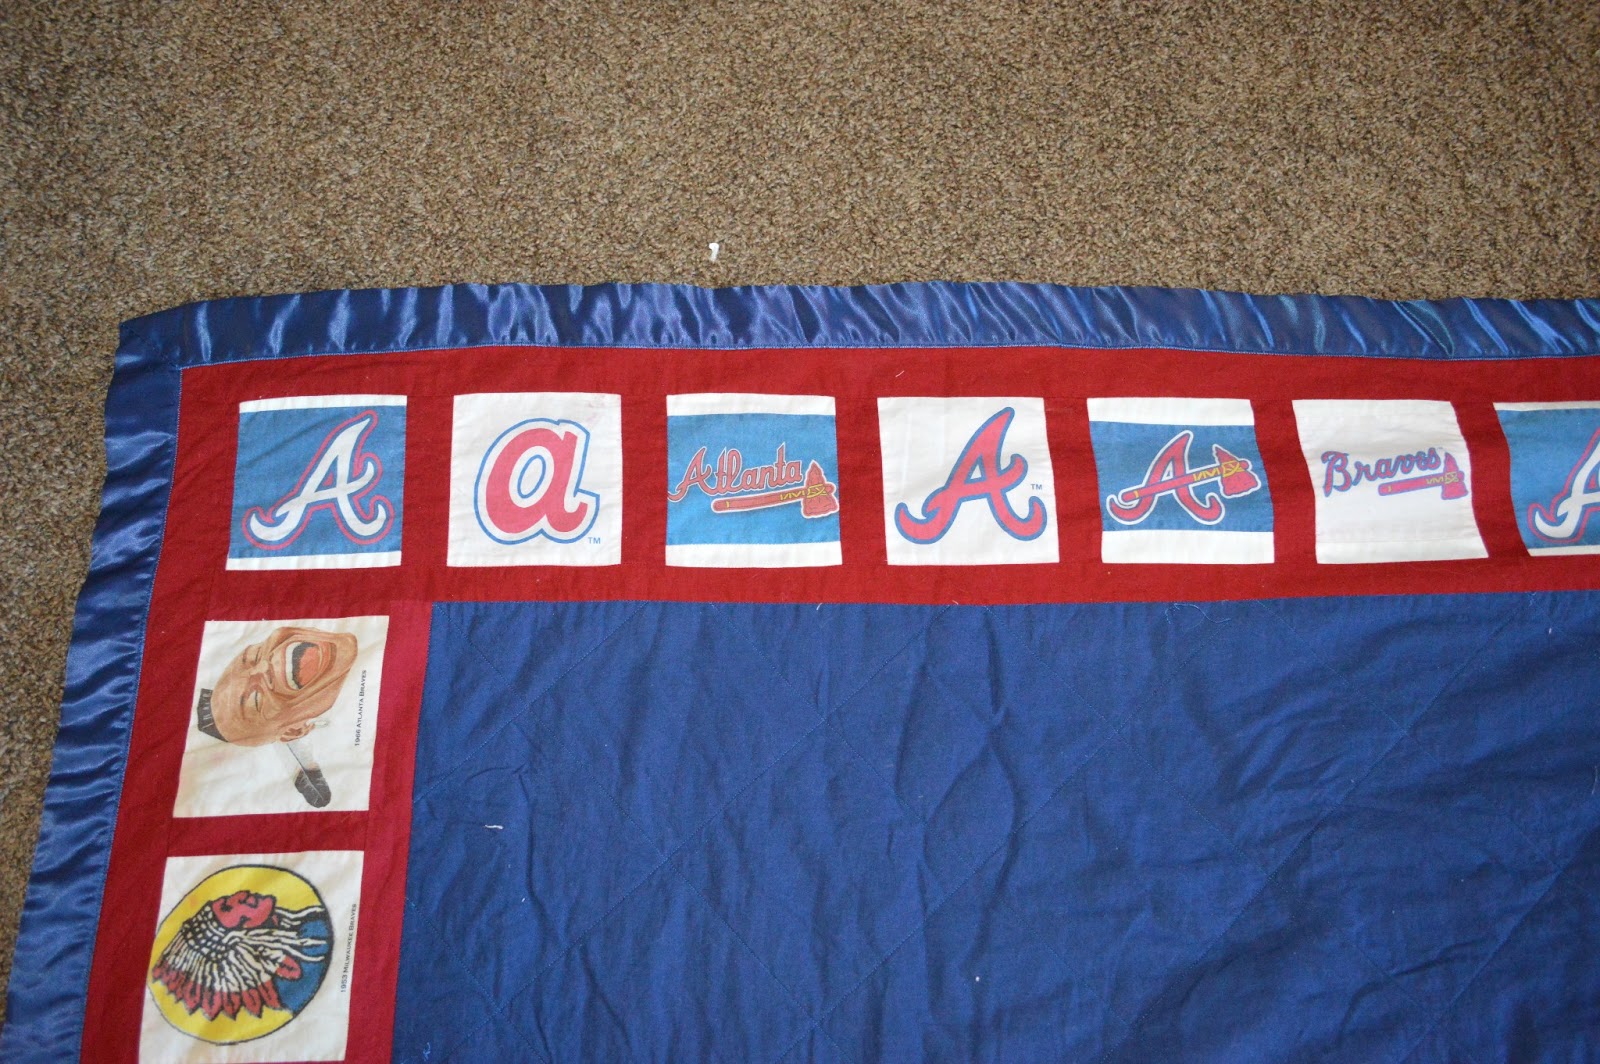
I then went really simple with the back and quilting, just using a licensed fleece with the Atlanta logo print, and a basic diamond quilted design, which I think ended up suiting the blanket perfectly. Then edges were then finished up with blue satin, and viola, it's complete!

There... I feel SO much better having finally done an update on this blanket. It's been bothering me for a year, that I made the last post talking about all my big plans, and then just left it hanging. For those of you who saw that original post, I hope you like the finished product!
Thursday, January 3, 2013
I'm Back!!!
Wow... what a year! I apologize for my absence the past year, but we have had A LOT going on! Last September I became pregnant with our 2nd child, and all last fall, and most of winter I was unable to move from my sofa, in fear of loosing what little food I was able to keep down from my previous meal. Then when Spring rolled around I was busy planning. If you've ever been pregnant, you know exactly what that planning means. Of course, this baby needed all new bedding, and needed a brand new nursery of her own. Since we only have a 3 bedroom house, this meant that she (oh ya... forgot to mention she's another girl!) would be in my craft room, so I had to creatively plan how to make that work, and not just look like a crib had been thrown in the corner. Luckily, when we moved in the year before, I had my craft room done in soft pinks and creams (very chic paris like with black accents and all), so it was already half way there. Then after getting the nursery together I had to start getting ready for my shower. Then there was the matter of my Dr. thinking that she would come early, so while she was due on June 6th, we were ready and waiting as of the beginning of May. As it turned out, just like her sister before her, she decided to come late, and didn't make her appearance until June 11th.
 So, with that said, June 11th we had ourselves a new baby, and life was grand... well sorta. I happen to be one of those women who gets really bad PPD, so every day around 4pm I would fall into a terrible depression. To top it off, this little one was colicky in the evenings for the first month of her life, so needless to say, life was pretty rough. Luckily for me, the PPD only last a couple weeks, and then all was back to normal. Then, before I knew it, it was August and I began homeschooling my oldest in Kindergarten... can you believe that... Kindergarten!


Then the holidays began to fall like dominoes and now here we are. By the way... Happy New Year! I can NOT believe it's 2013 already! What a year. Kaylie is turning 5 in exactly one week (seriously, how did this happen??), and Brooklyn will be 7 months old the day after that. To top it off, she started to crawl one week after she turned 6 months, and just last week started pulling herself up to standing. Things are just happening far to fast for my liking, but I am trying my best to live in the moment and soak it all up. Life with two girls has been amazing so far. They are like two peas in a pod, and Brooklyn just thinks Kaylie is the greatest thing since sliced bread. No one can make Brooklyn laugh and smile like Kaylie can... not even me, and that's saying something! Those two just hang out and play together all day long. It really is an amazing thing to watch, and I feel so blessed to have been given this opportunity in life.
Speaking of opportunities, with Brooklyn I ventured into the land of cloth diapering. At first I thought it was going to be a hassle, but was doing it to save on money, but now that I have entered the land of OZ, I am hooked. Cloth diapering is WAY better than using disposables. Forget the money factor, and forget the environment, these things are stinkin' cute (See the cute little fluffy butt below), and there are SO many brands, styles, and colors/patterns to choose from. It's like shopping for a cute outfit... quite literally. On a more serious note, however, one of the BIG advantages to cloth diapering is that Brooklyn does not get diaper rashes, whereas Kaylie had them ALL the time in sposies, and I just couldn't get rid of them. Very rarely will Brooklyn's bottom get red (usually if she had a messy diaper in the middle of the night), and even then, I just put a bit of CD safe butt cream on (CJ's BUTTer and Grandma El's are my personal favs), and it is completely cleared up a few hours later. That is what truely makes CD'ing worth it to me.... and they're cute! ;) Actually, my sister in law, who just had her daughter last January, just switched to cloth from sposies a few months ago because of rashes, and her baby hasn't had a rash since.
 Ok... so getting back to this opportunity I was speaking of. Coth diapers obviously have to be washed, and then they have to be dried. Some I line dry, like my pockets, and anything that happened to gets stains on them (the sun is your friend!!), but everything else goes straight into the drier. It usually takes me 2 cycles to get everything completely dry. Most of my diapers and inserts with dry in one cycle, but some (like my fitteds and thick hemp inserts) take 2 cycles to complete. That's where dryer balls come into play. "What are dryer balls?" you ask. They are little balls made of plastic or wool (wool is generally preferred but more expensive) that you throw into your dryer with your laundry, and then bounce around and cut down on drying time AND naturally soften your clothes, something that is a major plus with CD'ing mamas, since fabric softener is a big no-no. I have been wanting to get some wool dryer balls for some time, but at $34 for 6, I just couldn't justify the purchase to my husband, so I have forgone the purchase... until now! I recently stumbled upon an opportunity with Woolzies, a company who makes handmade 100% New Zealand wool dryer balls. They sent me a package of dryer balls to try out and review here on my blog, AND... host a giveaway to one of my readers for a free set of their very own. Awesome? I think so! I just got them in the mail today, so I haven't gotten the chance to test them out yet, but next week you can count on me having a review up, as well as a giveaway that you can enter for your very own set.
So... with that said, it is SO good to be back. I have SO many things planned for this year, including a new business venture that I plan to embark on (I can NOT wait to share this with you all), and many other fun things that I plan to do and make this year. Plus, as a huge bonus, my darling husband got me a really nice camera for Christmas, so I'm not able to start taking proper photos of my stuff to put on here. Yay!

Anywho... till next time! Be sure to check back next week for my review of Woolzies dryer balls, and enter for a chance to win a set of your own!


Then the holidays began to fall like dominoes and now here we are. By the way... Happy New Year! I can NOT believe it's 2013 already! What a year. Kaylie is turning 5 in exactly one week (seriously, how did this happen??), and Brooklyn will be 7 months old the day after that. To top it off, she started to crawl one week after she turned 6 months, and just last week started pulling herself up to standing. Things are just happening far to fast for my liking, but I am trying my best to live in the moment and soak it all up. Life with two girls has been amazing so far. They are like two peas in a pod, and Brooklyn just thinks Kaylie is the greatest thing since sliced bread. No one can make Brooklyn laugh and smile like Kaylie can... not even me, and that's saying something! Those two just hang out and play together all day long. It really is an amazing thing to watch, and I feel so blessed to have been given this opportunity in life.
Speaking of opportunities, with Brooklyn I ventured into the land of cloth diapering. At first I thought it was going to be a hassle, but was doing it to save on money, but now that I have entered the land of OZ, I am hooked. Cloth diapering is WAY better than using disposables. Forget the money factor, and forget the environment, these things are stinkin' cute (See the cute little fluffy butt below), and there are SO many brands, styles, and colors/patterns to choose from. It's like shopping for a cute outfit... quite literally. On a more serious note, however, one of the BIG advantages to cloth diapering is that Brooklyn does not get diaper rashes, whereas Kaylie had them ALL the time in sposies, and I just couldn't get rid of them. Very rarely will Brooklyn's bottom get red (usually if she had a messy diaper in the middle of the night), and even then, I just put a bit of CD safe butt cream on (CJ's BUTTer and Grandma El's are my personal favs), and it is completely cleared up a few hours later. That is what truely makes CD'ing worth it to me.... and they're cute! ;) Actually, my sister in law, who just had her daughter last January, just switched to cloth from sposies a few months ago because of rashes, and her baby hasn't had a rash since.
 Ok... so getting back to this opportunity I was speaking of. Coth diapers obviously have to be washed, and then they have to be dried. Some I line dry, like my pockets, and anything that happened to gets stains on them (the sun is your friend!!), but everything else goes straight into the drier. It usually takes me 2 cycles to get everything completely dry. Most of my diapers and inserts with dry in one cycle, but some (like my fitteds and thick hemp inserts) take 2 cycles to complete. That's where dryer balls come into play. "What are dryer balls?" you ask. They are little balls made of plastic or wool (wool is generally preferred but more expensive) that you throw into your dryer with your laundry, and then bounce around and cut down on drying time AND naturally soften your clothes, something that is a major plus with CD'ing mamas, since fabric softener is a big no-no. I have been wanting to get some wool dryer balls for some time, but at $34 for 6, I just couldn't justify the purchase to my husband, so I have forgone the purchase... until now! I recently stumbled upon an opportunity with Woolzies, a company who makes handmade 100% New Zealand wool dryer balls. They sent me a package of dryer balls to try out and review here on my blog, AND... host a giveaway to one of my readers for a free set of their very own. Awesome? I think so! I just got them in the mail today, so I haven't gotten the chance to test them out yet, but next week you can count on me having a review up, as well as a giveaway that you can enter for your very own set.
So... with that said, it is SO good to be back. I have SO many things planned for this year, including a new business venture that I plan to embark on (I can NOT wait to share this with you all), and many other fun things that I plan to do and make this year. Plus, as a huge bonus, my darling husband got me a really nice camera for Christmas, so I'm not able to start taking proper photos of my stuff to put on here. Yay!

Anywho... till next time! Be sure to check back next week for my review of Woolzies dryer balls, and enter for a chance to win a set of your own!
Tuesday, December 6, 2011
It's been a while
Let me start off by saying I am SO SORRY for not posting on here for 4 months! OMG, I can't believe it's been that long. Things have been so hectic around here that I haven't stopped to get on here and make updates. First off, in August, I had a pretty big audition and call back that took up about 3 weeks of my life. No, I didn't get the part, but it was a wonderful experience to have been a part of. Then in September I went on our yearly vacation to Big Bear with my mom, and then two weeks later I found out I was PREGNANT. Well, we were all (and still are) very excited about the new baby, and then the morning sickness struck with a vengance when I was only 5 weeks along. For about a month or so I couldn't even drag myself off the sofa, and that's with the anti nausea meds that I am on. Lets just say that this new baby is giving me a run for my money. Anywho, on the productive side of things, I've been working on a few new tutorials that I put together for Amanda over at the Quilted Fish. She's got a new paper line that she started up this year, and I made her paper crafting team. Yay! The first tutorial is already up on her blog (you can see it HERE), but I'll post it here as well in the next day or two. The next two tutorials I just completed today, so I'm really excited about those going up up within the next week. They're all easy tutorials that help get us ready for the holiday season. Amanda has this great holiday paper line with Bazzill Basics Paper called "Holiday Style," and it is too darling for words. I used this paper to create two gift boxes (one mini and one medium sized), as well as a paper gift bow that I also use in my larger gift box tutorial.
Anyway, my appologies a million times over for my absence these past few months, and I PROMISE to get you some new tutorials on here ASAP!
Anyway, my appologies a million times over for my absence these past few months, and I PROMISE to get you some new tutorials on here ASAP!
Tuesday, August 2, 2011
Frilly Fabric Flowers
Hello everyone! Today’s fabric flower tutorial is actually going to be part 1 of 2, in the making of a beautiful, shabby flower covered lamp shade tutorial. The plan is, that by next week I will have a lamp shade, and we will be applying these fabric flowers that we make today, to it.
Now... since my internet has been giving me the hardest time ever today, shutting down on me everytime I start downloading my photos, as well as half way through typing my tutorial for you all, I had to come up with another way of getting my tutorial to you all. Since my computer didn't want to cooperate with me typing straight onto my bog, I compliled it into a nice and easy PDF... did I mention that this is printable? It is! Not that this tutorial is so difficult that you'l really need to print it out, but just in case, you can!
SO... with all that out of the way, you can go ahead and find my easy Frilly Flower Tutorial HERE
Now... since my internet has been giving me the hardest time ever today, shutting down on me everytime I start downloading my photos, as well as half way through typing my tutorial for you all, I had to come up with another way of getting my tutorial to you all. Since my computer didn't want to cooperate with me typing straight onto my bog, I compliled it into a nice and easy PDF... did I mention that this is printable? It is! Not that this tutorial is so difficult that you'l really need to print it out, but just in case, you can!
SO... with all that out of the way, you can go ahead and find my easy Frilly Flower Tutorial HERE
Tuesday, July 26, 2011
I have plans....
Ok... so, I have had this plan for a tutorial for about a month and a half now, but am struggling to find the neccessary materials, at a price which I am willing to pay. Frustrating... I know! I feel horrible about not posting a tutorial in the longest time, but I can't find what I need to get it done. With that said, I have grown tired of waiting, so as of next week, I will post phase one of the tutorial, and then phase 2 when I can get my hands on what I need.
Enough of being cryptic... here is what I am planning... a Fabric Flower Lamp Shade.
 If you're not as excited about this as I am, then you just don't understand what it is I'm exactly talking about. Have you ever seen those uuber cute silk rose covered lamp shades? You know, the ones that cost upwards of $50+, or more (if you get the one from Pottery Barn, as pictured to the right). Well... I came up with an idea (All on my own, mind you!) for something along the same lines, but that costs next to nothing; and, if you are a quilter, sewer, lover of fabrics, etc. then you probably have everything but the lampshade already. (See above mentioned "missing materials"!) Now, while my lampshade isn't as cute as Pottery Barns, and doesn't have perfect little roses, it does give a nice illusion to being flower covered, and it adds a nice shabby chic touch to a room, since the ends are rough, and all the petals are gathered and frilled.
 There are ways to acheive a very similar DIY looking lampshade, but it requires purchasing silk roses, cutting the stems off, and gluing them all over (as seen in the picture to the left, the tutorial for which can be found HERE), but this will add at least an additional $15 - $25 (depending on the size of the lampshade and roses used) to the total price, and that is just too much for me to spend on a DIY craft. Already I'm being super picky, because I insist on finding a lampshade for $10 or less, and am having some difficulty with that. By the way, not to get too far off topic, but has anyone ever noticed how damn expensive lamp shades are?? It's ridiculous. $30- $50 for a plain lamp shade? I found one at Target for around $12, and I'll probably end up getting it, but I'd really like to find one for $6. When your husband doesn't freely fund your crafting, you try to pinch and save where you can!
Enough of being cryptic... here is what I am planning... a Fabric Flower Lamp Shade.
 If you're not as excited about this as I am, then you just don't understand what it is I'm exactly talking about. Have you ever seen those uuber cute silk rose covered lamp shades? You know, the ones that cost upwards of $50+, or more (if you get the one from Pottery Barn, as pictured to the right). Well... I came up with an idea (All on my own, mind you!) for something along the same lines, but that costs next to nothing; and, if you are a quilter, sewer, lover of fabrics, etc. then you probably have everything but the lampshade already. (See above mentioned "missing materials"!) Now, while my lampshade isn't as cute as Pottery Barns, and doesn't have perfect little roses, it does give a nice illusion to being flower covered, and it adds a nice shabby chic touch to a room, since the ends are rough, and all the petals are gathered and frilled.
  There are ways to acheive a very similar DIY looking lampshade, but it requires purchasing silk roses, cutting the stems off, and gluing them all over (as seen in the picture to the left, the tutorial for which can be found HERE), but this will add at least an additional $15 - $25 (depending on the size of the lampshade and roses used) to the total price, and that is just too much for me to spend on a DIY craft. Already I'm being super picky, because I insist on finding a lampshade for $10 or less, and am having some difficulty with that. By the way, not to get too far off topic, but has anyone ever noticed how damn expensive lamp shades are?? It's ridiculous. $30- $50 for a plain lamp shade? I found one at Target for around $12, and I'll probably end up getting it, but I'd really like to find one for $6. When your husband doesn't freely fund your crafting, you try to pinch and save where you can!
Anyway, since I am still looking for the perfect lampshade, I've decided to post a tutorial for my Frilly Fabric Flowers here next Tuesday, and then hopefully by the following Tuesday I'll have found a lampshade - or convinced my husband to cough up the $ for the one I already found - and then I'll complete my tutorial, by showing how to attach the flowers to the shade, and finish the project off (We all know how to use a glue gun right?). I'd ideally like to pair the lampshade with this darling pink "crystal" lamp base found HERE at ToysRUs, but am trying to find away around spending $30 for it... cheap, who me? ;) This finished product will then move to it's permanent residence a top my daughters dresser in her newly designed ballerina room, and hopefully give it just the right finishing touch.
Ok then, now that you know my plan, I look forward to "seeing" you back here next week, when I'll be diving into the oh so easy tutorial of frilly flower making. In the meantime, resist the urge to throw away your scraps of fabrics, and cut yourself a 2" circle template (makes this process go SO much faster if you have a template to cut around).
See you then!
Saturday, July 2, 2011
Unbelievable Macaroni Salad!
So, I've gotten a little behind on my posts lately, but hopefully this recipe will make it all up to you, and all will be forgiven as soon as you take your first bite! I'm not including a full photo tutorial with this recipe, since I won't be making it until the 4th, but I wanted to post the recipe now, so that everyone out there will get the opportunity to try the greatest Mac Salad you've ever had, and be the hero at this Monday's BBQ.
This recipe comes from my father, so it's a really big deal that I'm leaking this one out, since I guard his recipes with my life. If I haven't ever mentioned it on here before, my dad is the best cook I have ever known - actually I should probably call him a chef since he's owned and operated a few restaurants in his time. My love of cooking, and everything that I have learned, has come from my dad. It still blows my mind how damn good he is! He'll show up to visit for the weekend, and manages to whip out the most flavorful gourmet food you've ever seen, and he does it effortlessly to boot. If it were me making the meals that he makes, not only would they not taste as good as his, but it would look like a tornado had ripped right through the middle of my kitchen. Not my dad, though.... he's the best I've ever seen, and I'll stand by that to the grave.
So... here goes! You're in for a treat!
This recipe comes from my father, so it's a really big deal that I'm leaking this one out, since I guard his recipes with my life. If I haven't ever mentioned it on here before, my dad is the best cook I have ever known - actually I should probably call him a chef since he's owned and operated a few restaurants in his time. My love of cooking, and everything that I have learned, has come from my dad. It still blows my mind how damn good he is! He'll show up to visit for the weekend, and manages to whip out the most flavorful gourmet food you've ever seen, and he does it effortlessly to boot. If it were me making the meals that he makes, not only would they not taste as good as his, but it would look like a tornado had ripped right through the middle of my kitchen. Not my dad, though.... he's the best I've ever seen, and I'll stand by that to the grave.
So... here goes! You're in for a treat!
"Never Go Back to That Deli Stuff"
Mac Salad
Ingredients
1 lb, small Elbow Macaroni
5-6, stalks Celery
1, large Brown Onion
1, small jar sweet pickles (or gherkins)
8oz, Longhorn Cheddar Cheese
1 C, Mayo
Salt and Pepper, to taste
Directions
1) Cook macaroni according to package directions. Allow to cool completely.
**Tip** Add a drizzle of evoo to the water to keep the macaroni from sticking.
2) Finely dice celery, onion, pickles, and cheese.
3) Add veggies and cheese to cooled macaroni. Add mayo, and stir to combine.
4) Add salt and pepper to taste.
**I've found it's best to add less S&P, and allow others to add more if they desire.
So there it is! It's really simple, but Oh Man does it blow the competition out of the water! Trust me on this. Make a batch this 4th of July, spread the love around to your friends, and see how everyone just praises you for your amazing Mac Salad. The best part... ya, there's a best part! This salad actually gets better as left overs. How many recipes can do that?!
I'll post the full tutorial this coming Friday, pictures and all, so that you all can see exactly how I dice up my veggies and cheese... according to my dad's instructions!
Please let me know how things turn out for you if you do end up trying this recipe. I'd love to hear your feedback!
Cook, Eat, and Enjoy!
Saturday, June 11, 2011
Foodie.... Saturday??
So I completely forgot about Foodie Friday yesterday, so I'm going to go ahead and make up for that today. My family was in town this week, and were leaving yesterday, so my entire day was geared towards meeting up with them before they flew out, and as a result, Foodie Friday didn't happen. My sincerest apologies!
Anyway, this week I had planned on linking to other bakers sites for my Foodie Friday tutorial. I'm not sure if any of you remember, but I have a few favorite food blogs that I like to frequent - The Pioneer Woman has already been posted about all over this blog - and in the past couple of weeks I have been on a cookie frenzy, testing out cookies from two of these sites. What I have discovered is some truly divine (and guilty) pleasures! I would blog about them myself, but these women do such a wonderful job at it, and since these are their recipes, I'll just link you to them!
First off, back on the week that I made my A-Mazing Chocolate Chip cookies, I also made Oatmeal Raisin Cookies for my husband, since they are his favorite. I'm a bit picky when it comes to oatmeal raisin cookies, and I found a wonderful recipe on the Smitten Kitchen blog. If you'd like to test out this recipe for yourself, you can find it HERE! From my personal experience, I had better result with the cookies when I didn't chill them first, but you can try both ways if you'd like.
My second recipe is for the best Sugar Cookies my husband and I have ever eaten... I mean, seriously, these things are dangerously good! The recipe comes from none other than the extremely talented I Am Baker, and she uses a secret ingredient to her sugar cookies that just puts them over the edge... almond extract. I can't even begin to explain to you what this does to the taste of these cookies, you're just going to have to trust me, and try this recipe out.... right now! My only comment on this recipe is for you to be sure to not over cook these cookies. Trust in her cook time, and they will be wonderful. They may look under done, but when they cool, they are perfectly chewy... so trust in what she says! You can find her sugar cookie recipe HERE!
So there you have it... two more AMAZING cookie recipes, that have found a permanent residence in my recipe box, and I am sure will find their place in yours as well. If you happen to make these for yourself, I would love to hear about how you found them to be for you and your family.
Until then....
Anyway, this week I had planned on linking to other bakers sites for my Foodie Friday tutorial. I'm not sure if any of you remember, but I have a few favorite food blogs that I like to frequent - The Pioneer Woman has already been posted about all over this blog - and in the past couple of weeks I have been on a cookie frenzy, testing out cookies from two of these sites. What I have discovered is some truly divine (and guilty) pleasures! I would blog about them myself, but these women do such a wonderful job at it, and since these are their recipes, I'll just link you to them!
First off, back on the week that I made my A-Mazing Chocolate Chip cookies, I also made Oatmeal Raisin Cookies for my husband, since they are his favorite. I'm a bit picky when it comes to oatmeal raisin cookies, and I found a wonderful recipe on the Smitten Kitchen blog. If you'd like to test out this recipe for yourself, you can find it HERE! From my personal experience, I had better result with the cookies when I didn't chill them first, but you can try both ways if you'd like.
My second recipe is for the best Sugar Cookies my husband and I have ever eaten... I mean, seriously, these things are dangerously good! The recipe comes from none other than the extremely talented I Am Baker, and she uses a secret ingredient to her sugar cookies that just puts them over the edge... almond extract. I can't even begin to explain to you what this does to the taste of these cookies, you're just going to have to trust me, and try this recipe out.... right now! My only comment on this recipe is for you to be sure to not over cook these cookies. Trust in her cook time, and they will be wonderful. They may look under done, but when they cool, they are perfectly chewy... so trust in what she says! You can find her sugar cookie recipe HERE!
So there you have it... two more AMAZING cookie recipes, that have found a permanent residence in my recipe box, and I am sure will find their place in yours as well. If you happen to make these for yourself, I would love to hear about how you found them to be for you and your family.
Until then....
Happy Baking! Happy Eating!
Tuesday, June 7, 2011
Get Covered!
Todays Tutorial Tuesday, is going to be one of those where I just link you oiver to someone else's cool idea. I know... it's kinda lame, but hey, this tutorial changed my life this week. You see, everything I have in my sewing room, I basically "inherited" from my mother-in-law... including my ironing board... which has never had a cover. So for the past 2 years I've been ironing on a board without a cover, and for every day of those last two years, I've been telling myself that I have to get a dang cover for it. Finally, after all this time, I sat down a couple of days ago and began to google (my favorite thing to do!), and I found a pretty easy ironing board cover tutorial, that ANYONE can whip up in less than an hour. How awesome is that? See how this could change a girls life? No? Ok... well maybe I just get overly excited about things, but after 2 years of not being covered, all that is about to change. Additionally, I just moved and re-decorated my entire craftroom, so I'm going to make an ironing board cover to match... that can make a girl excited in and of itself!
Ok... enough talking, lets get down to sewing! If you would like to check out this quick and easy ironing board tutorial, click HERE.
Ok... enough talking, lets get down to sewing! If you would like to check out this quick and easy ironing board tutorial, click HERE.
Happy Sewing!
Friday, June 3, 2011
A-Mazing Chocolate Chip Cookies!
I LOVE chocolate chip cookies, but I've always been on the hunt for the perect one... and I think I finally found it. Here's my feeling on the whole thing, brown sugar makes the cookie. So for about an entire week I sat on the computer reviewing recipe, after recipe, after recipe... and I think I've found it! I've made these cookies a few times now, and every time I do my husband just sings their praises. I can't remember exactly where I found the recipe (I reviewed WAY too many), but I think it was from someone on Allrecipes.com. I love that site! Anyway, back to the whole point of this post... Let me share the recipe with you!
 ** Apparently my head was not in this when I was taking the photo, because the eggs are missing, and I am showing 1 C sugar instead of a 1/2 C. Don't be like me... follow the ingredient list above!




A-Mazing Chocolate Chip Cookies!
Makes 40 - 45 cookies
Ingredients
1 C (2 stks), Butter - softened
1/2 C, Sugar
1 1/2 C, Brown Sugar
2 Eggs
2 tsp, Vanilla
2 3/4 C, Flour
3/4 tsp, Sea Salt (not table salt!)
1 tsp, Baking Soda
1 1/2 tsp, Baking Powder
2 1/4 C, Chocolate Chips
1 C, Walnuts - chopped

Directions
Preheat oven to 350
Cream butter and sugars on Med-High for 3 minutes, until light and fluffy.

Add eggs and vanilla, and beat an additional 2 minutes.

In seperate bowl, sift together flour, salt, baking soda, and baking powder. Add dry indredients to wet ingredients, 1 cup at a time, scraping the sides after each addition.

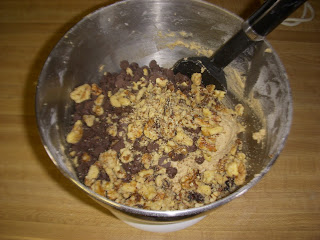
Gently mix in chocolate chips and walnuts.


With a cookie scoop, or a Tablespoon, drop cookie dough onto a greased cookie sheet.
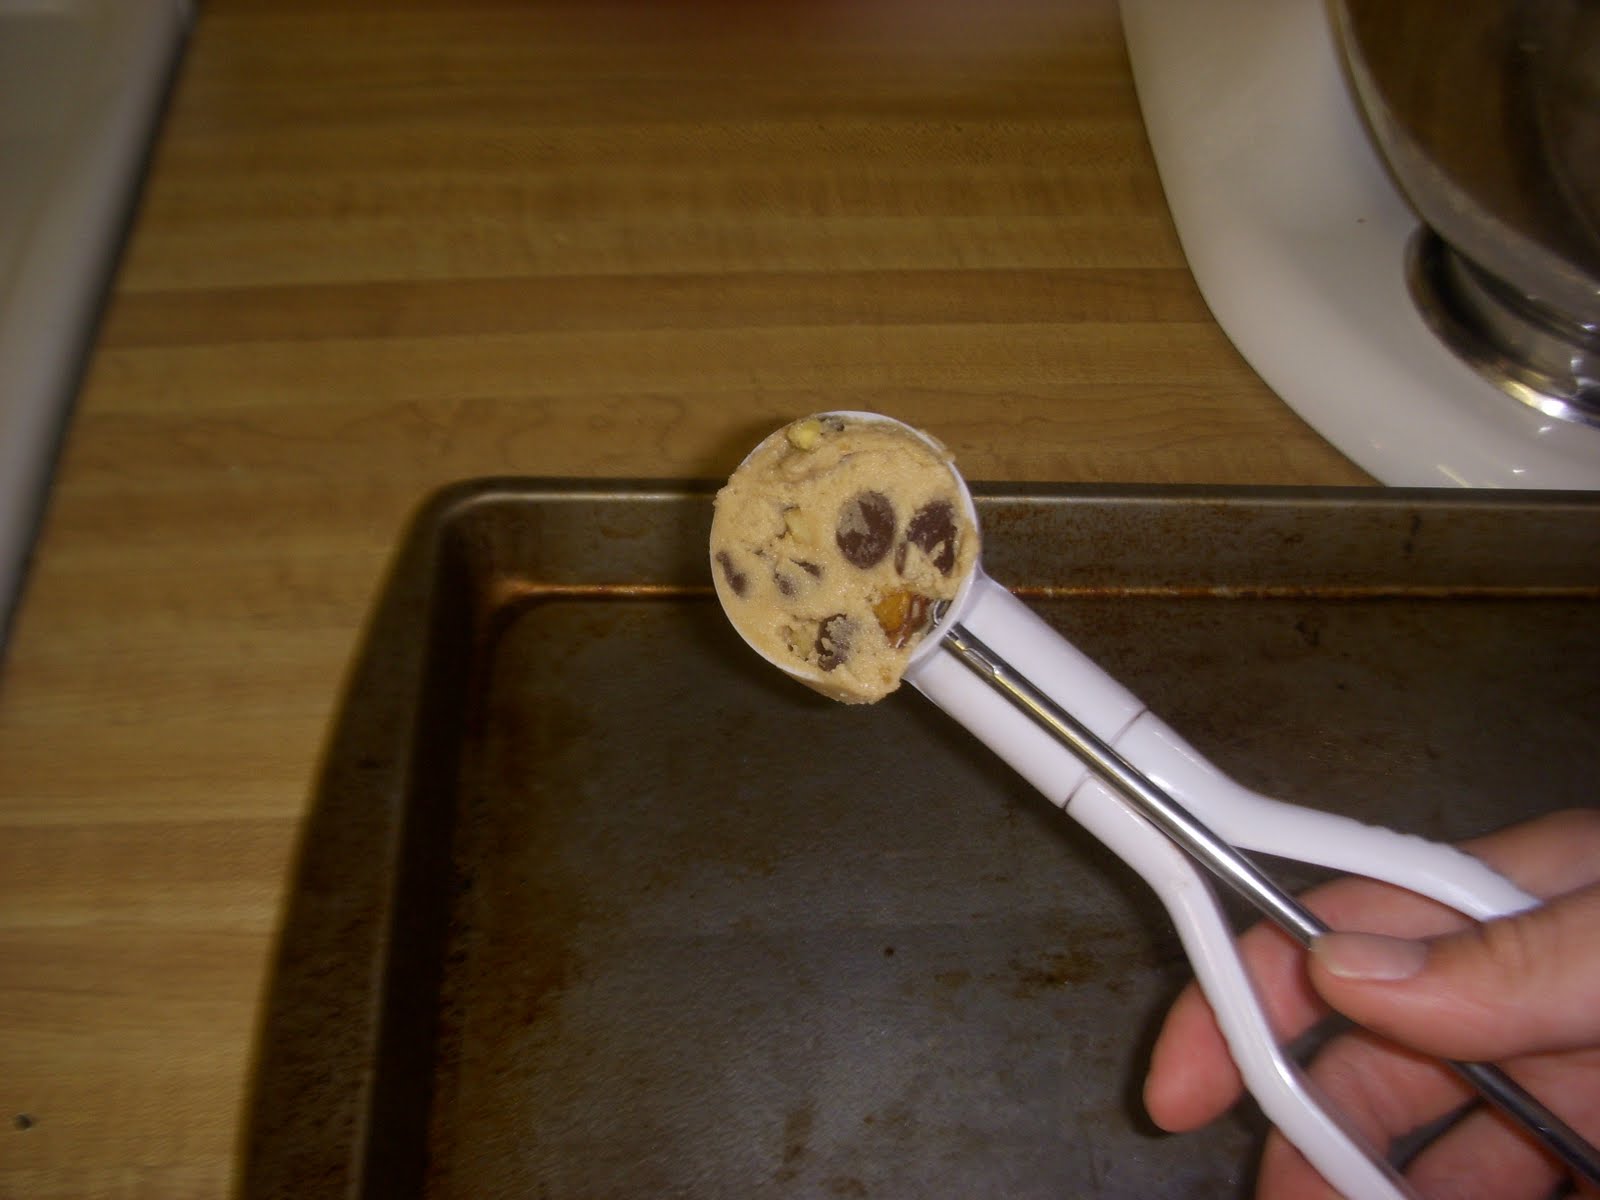

Cook 12 - 14 minutes
Let rest 2 minutes, then remove from pan and cool an additional 3 minutes.

Eat and Enjoy!
Tuesday, May 31, 2011
Crochet Flower Button Hole Cover Tutorial!!!
Welcome to my first Tutorial Tuesday!! Today I have a tutorial planned that goes perfectly with my "Oh So Sweet" Patchwork Dress tutorial, which you can find at Riley Blakes Cutting Corners HERE. Today's tutorial is a super easy Crochet Button Hole Cover, which just so happens to be in the shape of a flower. I designed this to compliment Riley Blake's Sweet Divinity fabric, which I used in creating my patchwork dress.
SO... Here goes!
Crochet Flower Button Hole Cover (Beginner +)
This crochet button hole cover is a cute way to jazz up any button hole, and create a darling flower for your button to nestle into. The pattern is relatively simple, working with the half-double crochet stitch, as well as simple chain and slip stitches. As long as you are able to work slowly, being able to grab the tiny threads, you will do fine and have beautiful crochet flowers in no time!
Materials:
• 3mm (D) crochet hook
• Appropriate weight natural fiber thread
Basic Key Terms:
Instructions:
Rnd 1: Ch. 10. Sl st into 1st ch. forming a circle.


Finishing:


SO... Here goes!
Crochet Flower Button Hole Cover (Beginner +)
This crochet button hole cover is a cute way to jazz up any button hole, and create a darling flower for your button to nestle into. The pattern is relatively simple, working with the half-double crochet stitch, as well as simple chain and slip stitches. As long as you are able to work slowly, being able to grab the tiny threads, you will do fine and have beautiful crochet flowers in no time!
Materials:
• 3mm (D) crochet hook
• Appropriate weight natural fiber thread
- (I used a doily weight bamboo crochet thread, which called for a 1.5mm crochet hook, and doubled it up for extra thickness. ) As long as you use a 3mm crochet hook, any thread that can work on that hook is fine!
Basic Key Terms:
- Ch. = Chain
- St. = Stitch
- Sl st. = Slip Stitch (although I think I write this one out)
- Hdc = Half-Double Crochet
Instructions:
Rnd 1: Ch. 10. Sl st into 1st ch. forming a circle.

Rnd 2: Ch. 4. *Hdc into circle, ch. 2* Repeat from * 7 more times. (You should have a total of 8 hdc’s worked into the circle.) After completing your last ch.2, slip stitch into the top of the first hdc.

Rnd 3: Work *5 hdc’s into the 1st ch. 2 space. Ch. 1. * Repeat from * 7 more times, working 5 hdc’s in each ch. 2 space around. After working your last 5 hdc’s into the last ch. 2 space, slip st. into the same space.


Rnd 4: Ch. 1. *Work 6 hdc’s into the 3rd st. from hook (this will be the center st. of the lower “scallop” [5 hdc’s]). Slip stitch into the ch. 1 space.* Repeat from *, working all the way around the circle.


Rnd 5: After your final slip st. bind off and weave in ends.
Finishing:
- Sew button cover around the opening of the button hole opening, right where the button will push through and sit.
- Push the button through the button hole, and marvel at the adorable creation you have made.


Ta Da!!! You now have a darling flower button hole cover. Easy as pie!

Friday, May 27, 2011
Changes...
For those of you who stumble upon my blog on a semi-regular basis, you may be wondering why I keep posting about food. I admit that the first few posts were completely random, and based solely on what I happened to be excited about making that day, but today's food post was very deliberate, and is the start of new things to come for my blog. I have decided to create a "schedule" for my blog, so that you - my readers - may know what to expect from me, and when. So, with that said, Fridays will now be "Foodie Friday," and Tuesdays will be "Tutorial Tuesday." Foodie Fridays will highlight a recipe that I love, or stumbled upon and just couldn't resist; and Tutorial Tuesdays will highlight a tutorial - of some craft - either from my own head, or linking a tutorial that I found on the web. I know this is a BIG goal to have, taking on two days worth of ideas and blogging about them, but that's what I'm aiming for. I may fail miserably, and only have tutorials and recipes every other week, but I promise to try my best to get them on here weekly. So far I've got today's Foodie Friday done, and have something planned for this up coming Tutorial Tuesday, and hopefully they keep on coming. I'm keeping my fingers crossed! ;)
Till then... have a wonderful Memorial Day weekend!!
~ Alicia
Till then... have a wonderful Memorial Day weekend!!
~ Alicia
The Perfect Spaghetti!!
Ok, so I know "The Perfect Spaghetti" is a rather big statement to make, and I realize that everyone's tastes might not run along with mine, but this IS the perfect spaghetti for my family. After years of searching for the right spaghetti recipe to suit my family's desires, I finally came up with my own, after picking and choosing what I liked from others out there on the web. Here's the dilemma I faced... I am a veggie girl, my husband is a plain meat sauce kind of guy, and we both prefer a thicker, more savory (none of the sugar stuff in this recipe) kind of spaghetti. What I came up with was a simple, tasty spaghetti, that even my 3 year old asks for all the time!
So, here it is...
What You Need:
1 pkg (1lb.) Italian Sausage (or 1 lb. from the butchers counter)
1 28 oz. can Crushed Tomatoes
1 28 oz. can Diced Tomatoes
1 Large Onion, finely diced
2 Green Bell Peppers, finely diced
1 pkg Mushrooms, finely diced
1 1/2 Tbsp Garlic, chopped (more if you desire)
1 1/2 Tbsp Oregano (more if you desire)
Salt and Pepper, to taste

Instructions:
1) Heat a large skillet over medium high heat, and drizzle around with evoo.
2) Remove sausage from casing (if you didn't purchase from the butcher), and throw it in the skillet. Break up the sausage with the back of a fork, so that it begins to resemble ground beef. Continue to break up the sausage as it browns.


3) Once the sausage is browned, put it into your slow cooker (if you don't have one, use a big pot)

4) Add your cans of tomatoes, veggies, garlic and oregano, and mix thoroughly.


5) Cover your slow cooker, and turn it to high.

6) Cook for 3 hrs, stirring occasionally.
7) Add salt and pepper to taste, stir to combine. Recover, turn heat to low, and cook an additional 2-3 hrs, or until ready to eat.
8) When ready to serve, brown up another package of Italian sausage to go on top, or make some Italian meatballs (I'll have to post my recipe for that later!). Cook spaghetti or fettuchini noodles, according to package directions. Put your drained noodles in a bowl, and spoon a healthy portion of spaghetti sauce over top, finishing off with your Italian sausage or meatballs. Round out your meal with "The Bread," recipe by, none other than, The Pioneer Woman. Pour yourself a nice glass of wine (I prefer Riesling), and ENJOY!
So, here it is...
What You Need:
1 pkg (1lb.) Italian Sausage (or 1 lb. from the butchers counter)
1 28 oz. can Crushed Tomatoes
1 28 oz. can Diced Tomatoes
1 Large Onion, finely diced
2 Green Bell Peppers, finely diced
1 pkg Mushrooms, finely diced
1 1/2 Tbsp Garlic, chopped (more if you desire)
1 1/2 Tbsp Oregano (more if you desire)
Salt and Pepper, to taste

Instructions:
1) Heat a large skillet over medium high heat, and drizzle around with evoo.
2) Remove sausage from casing (if you didn't purchase from the butcher), and throw it in the skillet. Break up the sausage with the back of a fork, so that it begins to resemble ground beef. Continue to break up the sausage as it browns.


3) Once the sausage is browned, put it into your slow cooker (if you don't have one, use a big pot)

4) Add your cans of tomatoes, veggies, garlic and oregano, and mix thoroughly.


5) Cover your slow cooker, and turn it to high.

6) Cook for 3 hrs, stirring occasionally.
7) Add salt and pepper to taste, stir to combine. Recover, turn heat to low, and cook an additional 2-3 hrs, or until ready to eat.
8) When ready to serve, brown up another package of Italian sausage to go on top, or make some Italian meatballs (I'll have to post my recipe for that later!). Cook spaghetti or fettuchini noodles, according to package directions. Put your drained noodles in a bowl, and spoon a healthy portion of spaghetti sauce over top, finishing off with your Italian sausage or meatballs. Round out your meal with "The Bread," recipe by, none other than, The Pioneer Woman. Pour yourself a nice glass of wine (I prefer Riesling), and ENJOY!
Sunday, May 15, 2011
Mmm...Mmm...Good!
So I'm posting about food again... Sorry! ;) BUT I just made the most amazing breakfast EVER this morning, and I just had to share. In my last post I made mention about a couple of my favorite food blogs, and like my last post, I am again singing the praises of the Pioneer Woman.
Last week I found a recipe for Lemon Blueberry Pancakes, and thought, "Oh my, those look good!" My husband is a BIG breakfast person, and I am not, so rarely does he get a good home cooked breakfast from me, however, when I saw these pancakes I knew I had to test them out, and treat my husband to a good morning meal. Now I'm not going to go on and on about how I prepared breakfast this morning, but I will say that these pancakes are AMAZING. So... with that said, I highly suggest that you treat yourself, your significant other, or anyone else you happen to know, and try these pancakes for yourself the next time you make breakfast. You can find the recipe at the Pioneer Woman website by clicking HERE.
Last week I found a recipe for Lemon Blueberry Pancakes, and thought, "Oh my, those look good!" My husband is a BIG breakfast person, and I am not, so rarely does he get a good home cooked breakfast from me, however, when I saw these pancakes I knew I had to test them out, and treat my husband to a good morning meal. Now I'm not going to go on and on about how I prepared breakfast this morning, but I will say that these pancakes are AMAZING. So... with that said, I highly suggest that you treat yourself, your significant other, or anyone else you happen to know, and try these pancakes for yourself the next time you make breakfast. You can find the recipe at the Pioneer Woman website by clicking HERE.
Happy Eating!
Wednesday, May 11, 2011
FOOD!!
I'm kind of a foodie. Actually, I am a really big foodie. I love food. I love to bake it. I love to cook it. And guiltily, I love to eat it! So, ever since I have retired from school to be a stay at home mom, I cook... and bake... and eat... ALOT. All the while desperately trying to keep a hold of my little figure. I want to cook, and bake, but then I have to eat it. It's kind of an addiction - the cooking - I'm just trying to figure out how to manage the eating part. :(
So, to get to the point of this whole thing, yesterday while browsing her many tasty recipes, I came upon her recipe for home made flour tortillas. Now I have always wanted to make my own tortillas, but have always been a bit scared. BUT, Ree said that there was no worries, so I said what the heck, and went to work today making 4 dozen flour tortillas. Like Ree mentions in her recipe, there is a learning curve to cooking the tortillas, but after throwing out the first few for being as stiff as a board, I was making A-mazing tortillas like a pro.

(By the way, they're not supposed to be perfectly round... not that I could have gotten them that way even if they were! ;)
Then to make it even better - and because I have a really bad sweet tooth right now - I took my last two tortilla dough balls, rolled them around in sugar before rolling them out on my cutting board, and then sprinkled then with cinnamon and little more sugar. When cooking, the sugar begins to caramelize on the outside, and because I rolled the dough around in sugar before rolling it out, the tortilla was completely laced with sweet sugar on the inside as well. It was just the right amount of sweetness to satisfy my mid-afternoon craving, not too sweet, but just enough... especially that caramelized bit!

So what I say to you now is go check out her blog... it will change your life! And if you want to make your own flour tortillas, you can find the recipe on her site HERE.
Happy Baking. Happy Cooking. Happy Eating.
(Hopefully guilt free!)
Subscribe to:
Posts (Atom)